
Ditto Projecting & Cutting FAQUpdated 4 months ago
You can find some of this information (and more) in the Cutting article and the Calibration article.
Is there training available on using my Ditto system?
- There are tutorials available in the Learning Center on the Ditto website, as well as on our YouTube channel.
Will I lose work in progress when I close a pattern in the app workspace?
- No. The workspace is automatically saved when you exit the app.
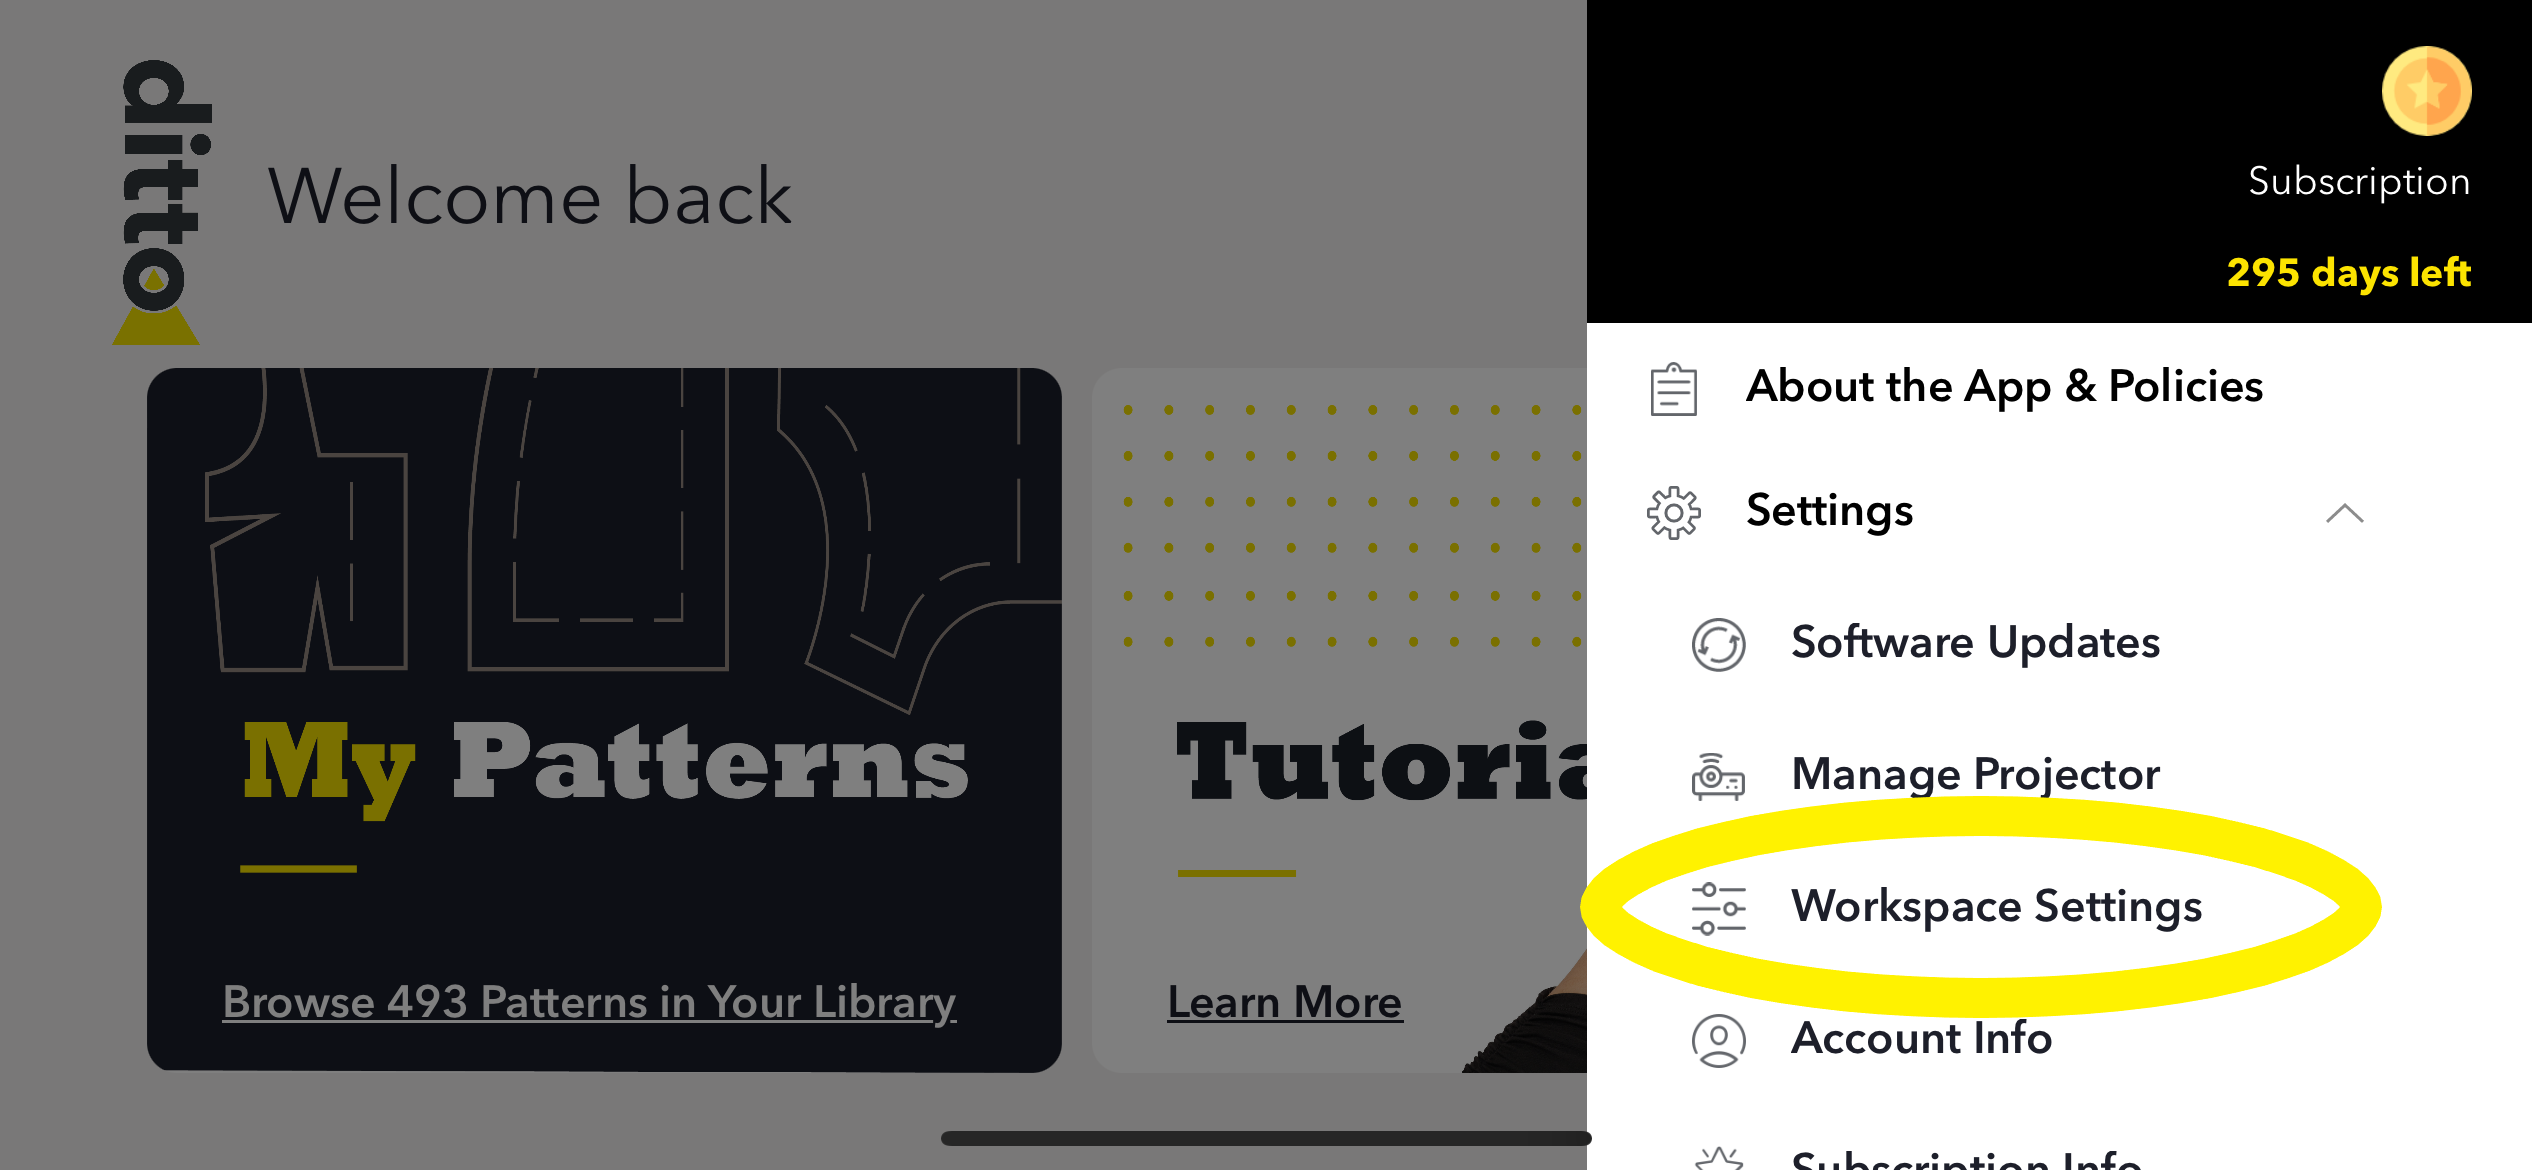
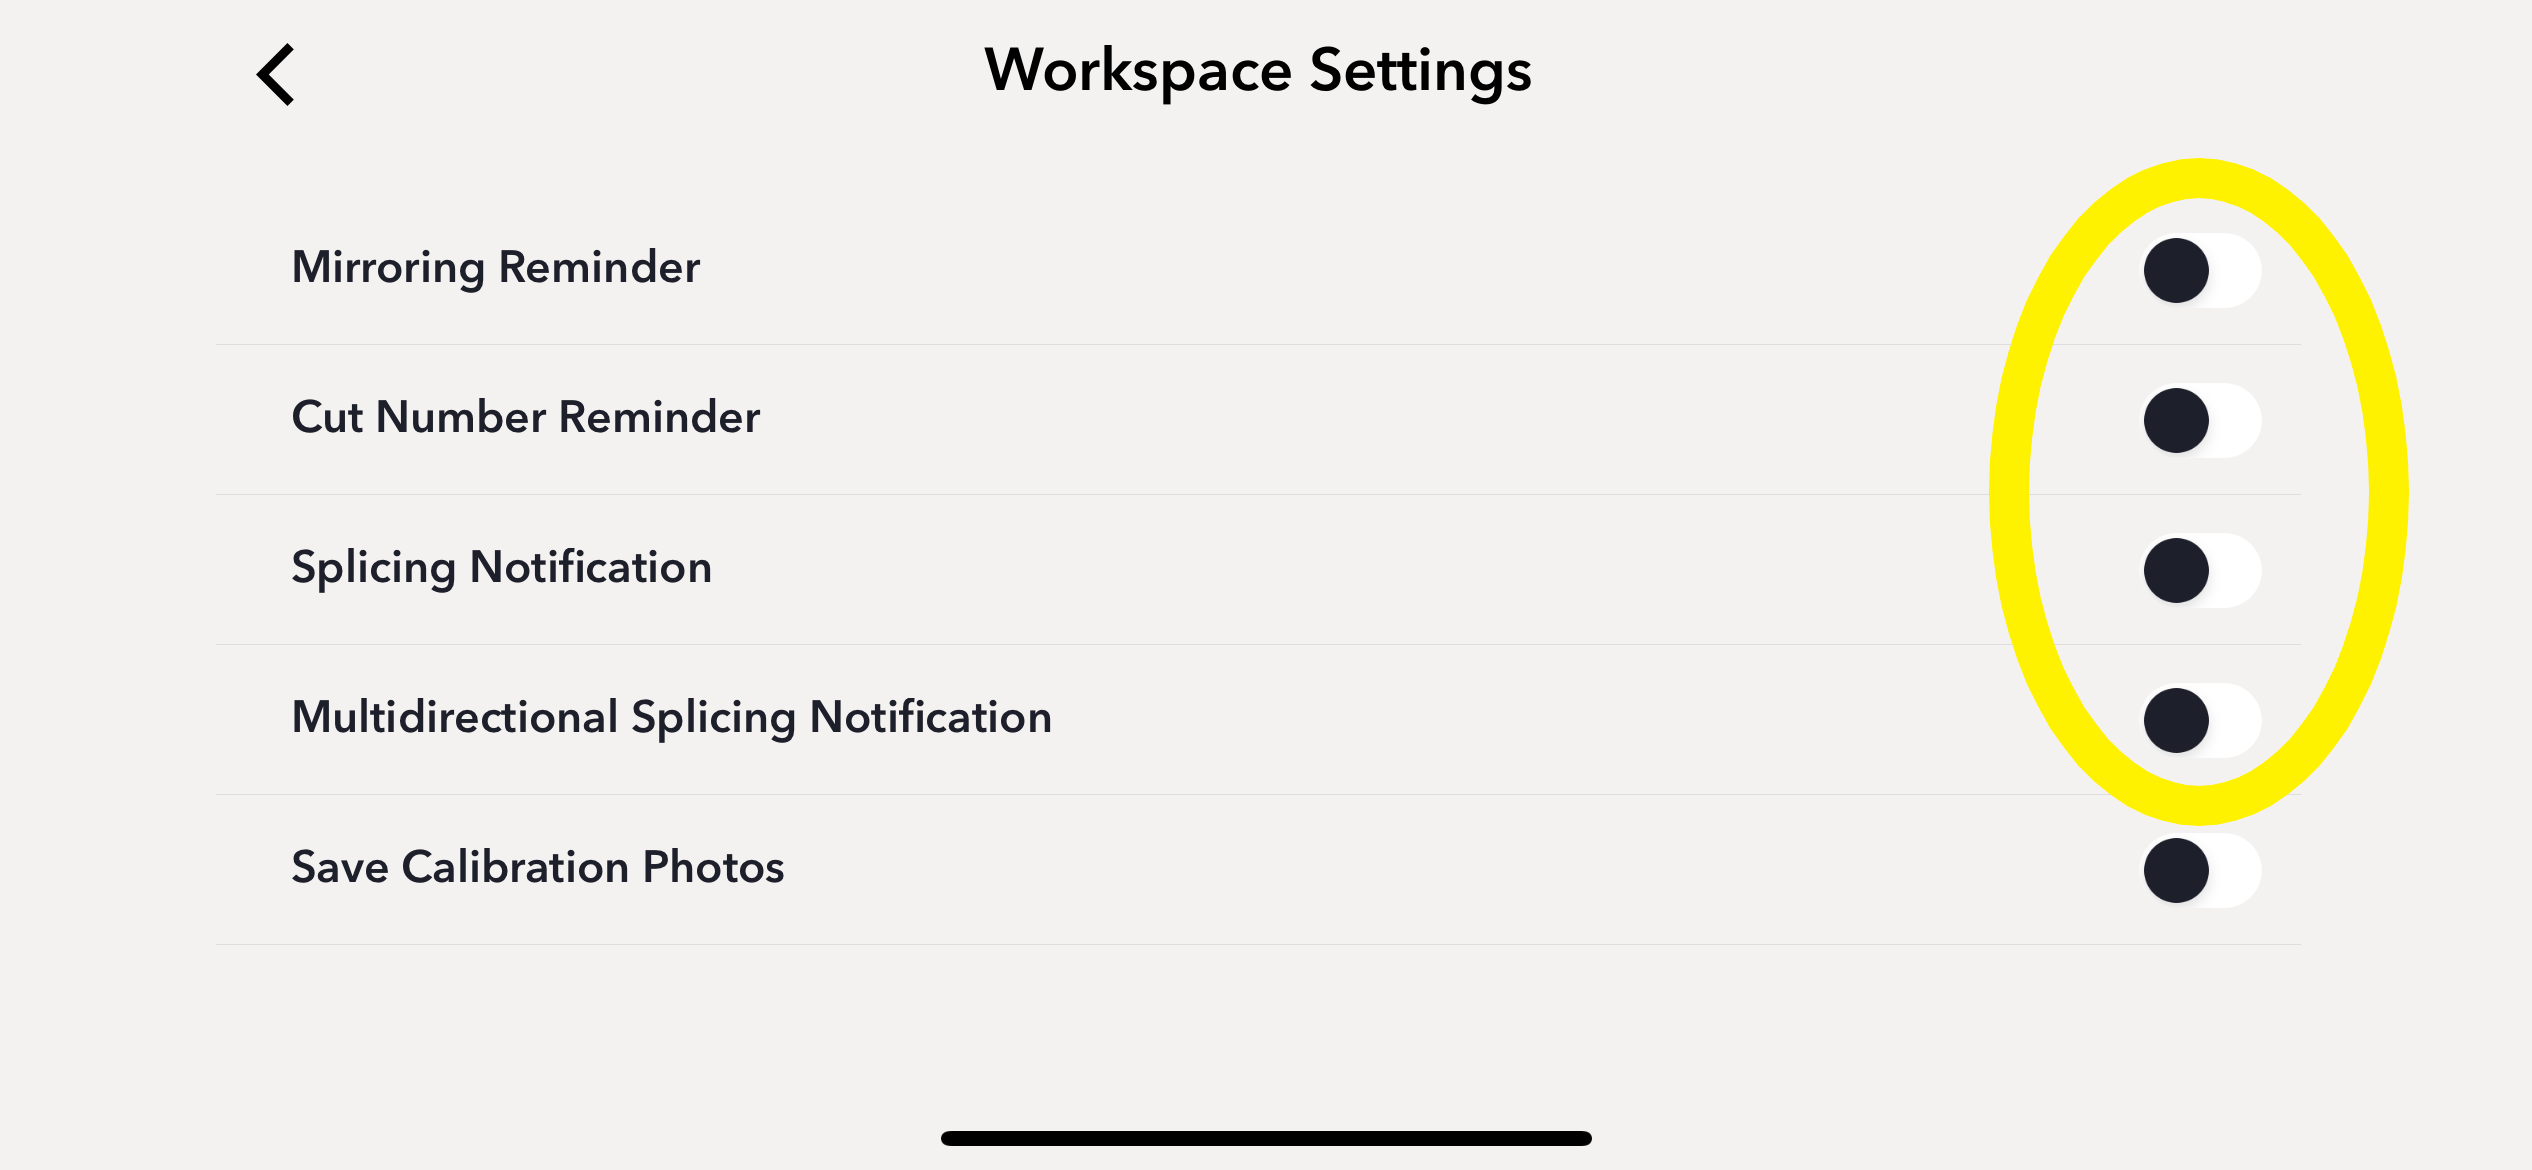
I don’t want to continue receiving all the pop-up reminders in the Ditto app. Can I turn them off?
- Users can disable app pop-ups at any point. Simply toggle off reminder notifications in Settings on the Ditto app. Settings are located in the menu bar at the top right corner on the home screen.
What do I do if my app shows calibration success, but the projected image looks odd/off?
- Select the Calibrate button again and redo the calibration process. It should only take a few minutes.
My lighting is off; what is the best way to fix this?
- Calibration works best in a dimly lit room. You may need to cover nearby windows.
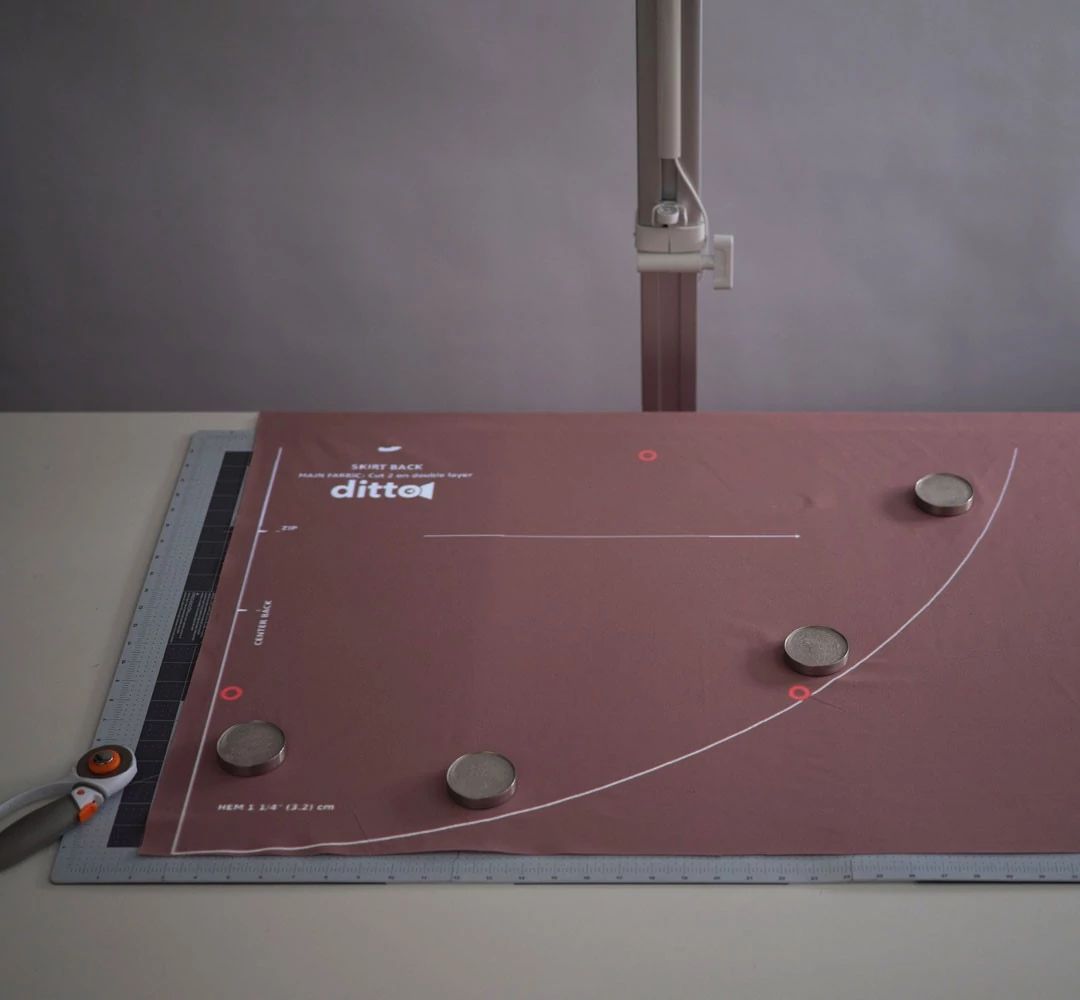
How do I determine the size of fabric needed for a spliced piece?
- Lay out your fabric.
- Project the spliced pattern piece and measure the first projection frame.
- Mark the location of the splice target projections with the target stickers.
- Move the projection and fabric to the other end of the spliced pattern piece.
- Measure from your marked targets to the other end of the projection.
Do I need a rotary cutter to use this system?
- No. You can cut the projection with a pair of scissors, or trace with a marking tool and then cut with a pair of scissors.
Where on the projection line should I cut my fabric? What about seam allowance?
- Cut on the outside of the projection line.
- A standard 5/8" seam allowance is included in all Ditto patterns. Seam allowances for all other brands can be found in the sewing instructions.
Do I need to trace my pattern, or can I just cut it by following the projection?
- You can cut the fabric by following the projected pattern piece lines. However, we do recommend that you trace the pattern pieces when there is a multidirectional splice required.
Can I use another cutting mat with this system? Will you offer a larger one? I see a tiny problem with matching patterns.
- The Ditto cutting mat is needed for calibration. Once it’s calibrated, you may switch to another mat–although it isn’t recommended or needed, as this mat was developed for use throughout the project.
- Ditto was developed with a technique called splicing that accommodates pattern pieces larger than the 36″ x 24″ cutting mat included with the system. Splicing uses target stickers to connect linked sections of a pattern piece to yield the user one accurately cut, oversized pattern piece.
- Caution! Do not use the Ditto cutting mat for other crafts, as glue and paint will show up on your picture and could alter your pattern marks.