
PFAFF® select™ 4.2 Sewing MachineUpdated 4 months ago
Tips for Successful Sewing
Whether you are an experienced sewist or just getting started, these helpful troubleshooting tips will help you keep your PFAFF® sewing machine running its best!
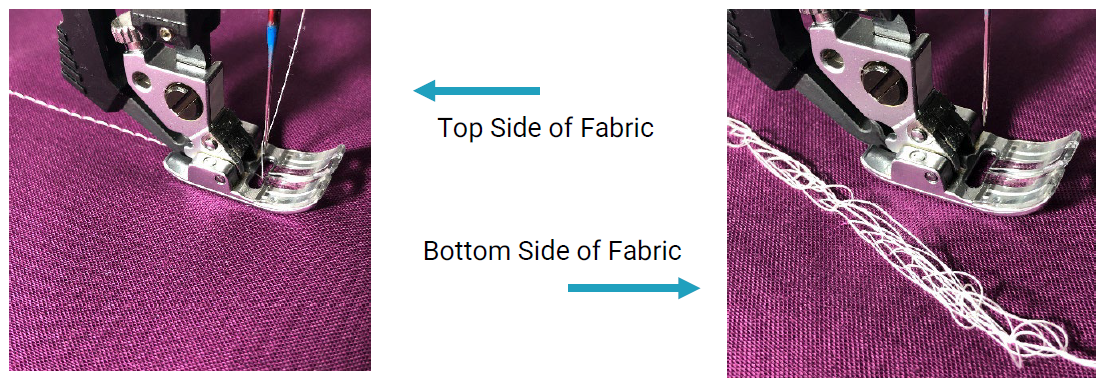
Thread Loops on Underside of Fabric
If stitches look normal on the fabric’s top side but there are thread loops on the underside, although it seems counter-intuitive, thread looping on the underside of the fabric normally indicates that the upper thread is not correctly threaded. This can happen when the upper thread is not correctly placed in the tension mechanism during the threading process, and/or the thread has not been threaded through the eye of the take-up lever.
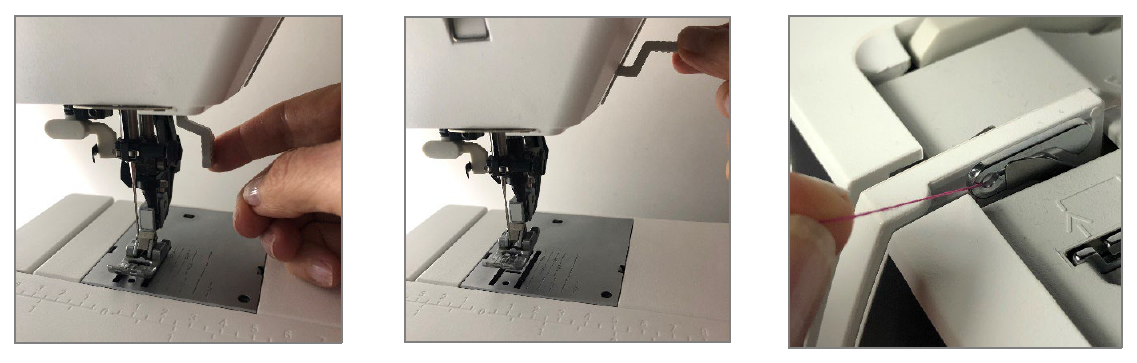
This can usually be resolved by first completely removing the upper thread from the machine, and then rethreading the machine. But, before you start rethreading, first raise the presser foot lifter, so that the thread can be properly seated in the tension mechanism. Then, turn the hand wheel toward you until the needle is in its highest position and you can see the take up lever. This will help you make sure the take up lever’s eye gets threaded.
Bobbin Thread Showing on the Top Side of Fabric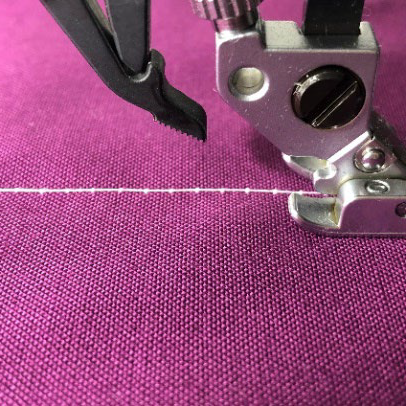
Bobbin thread can pull up to the top side of the fabric if the top thread tension is too tight, if the threading path is obstructed, or if the wound bobbin is not correctly placed in the bobbin holder.
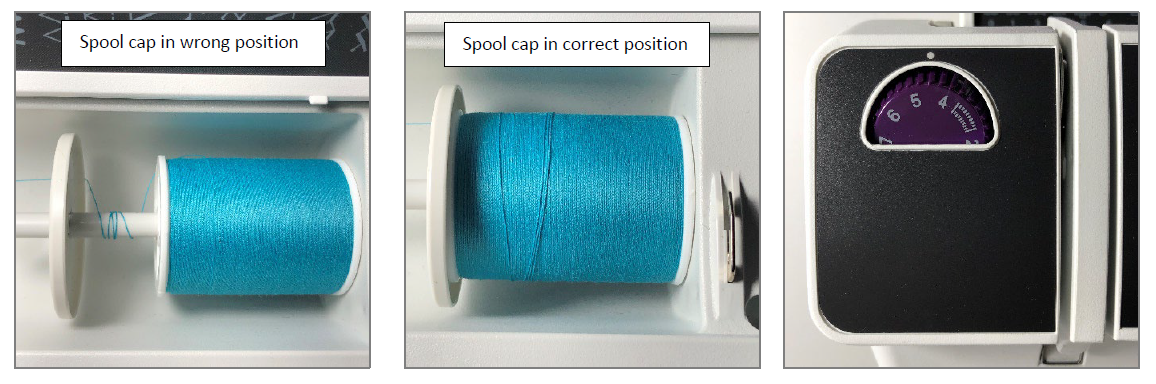
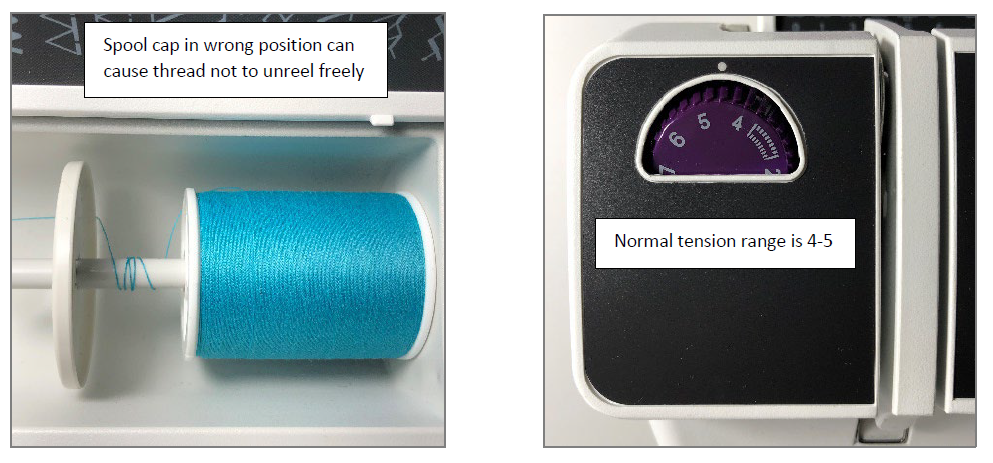
First check that the upper thread is feeding freely without obstruction. Thread can get obstructed if the spool cap at the top of the machine is not pushed up next to the spool. Thread can also get obstructed if it is getting caught on any rough spots on the spool itself.
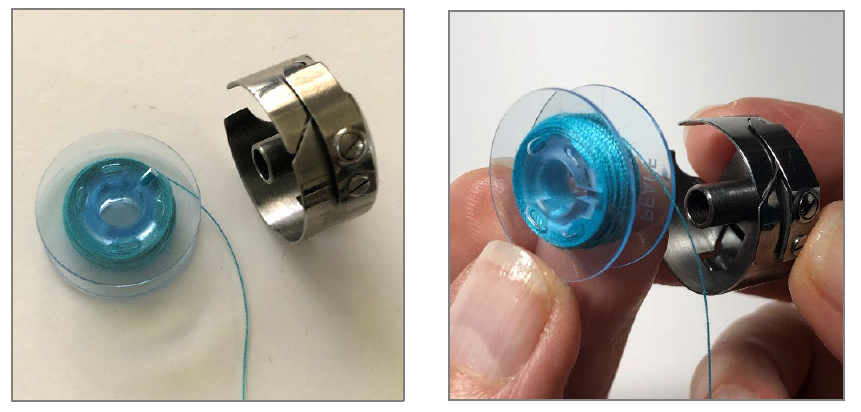
Next, make sure the bobbin is correctly seated in the bobbin holder – the bobbin should turn clockwise when you pull the thread end. Also, check that the upper thread tension is not set too tightly for the thread and fabric you are using. The setting range from 4 to 5 is normal for most regular sewing thread.
Fabric Is Not Feeding
If the machine is not feeding fabric when you start sewing, it could be that the presser foot lifter has not been lowered before stepping on the foot control. Lower the presser foot lifter so the foot is in contact with the fabric, then resume sewing. Depending on your fabric and project, you may choose to engage the IDT™ as well. See page 21 of your Owner’s Manual for more information about using the IDT™ system.
The machine may also not feed fabric if the stitch length setting has been set to “0”, or the stitch length setting is too short for the thickness of thread and fabric being used. Increase the stitch length setting and resume sewing.
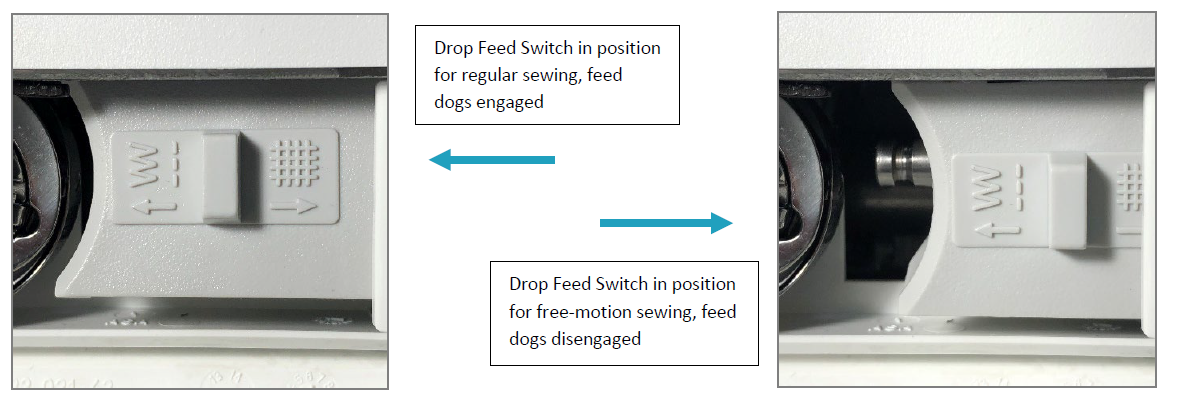
Another reason the fabric may not be feeding is if the feed dogs are disengaged (lowered). Make sure the feed dogs are properly engaged for regular sewing.
Note: If you have disengaged feed dogs for free-motion sewing, you will need to re-engage feed dogs for regular sewing. To do this, simply move the Drop Feed Lever back to regular sewing position.
Thread Is Shredding
As you sew, thread can begin to shred for various reasons.  Thread can shred if the needle is dull or damaged, or if the needle is the wrong style and size for the thread being used.
The thread should pass freely through the eye of the needle to sew properly. If it does not pass freely, you should choose a needle that has an eye large enough to accommodate the thickness of the thread.
Some specialty threads, such as metallic threads, will feed more smoothly into the machine if they unreel vertically rather than horizontally, as vertical feed reduces the amount of ‘twist’ on the thread. To sew with the thread in vertical position, install your second spool pin. Start by placing the second spool pin into its hole on top of the machine. Next, place a spool cap onto the spool pin, which will provide a ‘base’ for the thread. It is helpful to add the felt pad on top of the spool cap to help prevent the thread spool from spinning too fast when you are sewing.

Needles Are Breaking
Needles can break if they are bent, dull or damaged. Discard the old needle and insert a new needle, appropriate for the fabric being sewn. Needles can break if they are not the right size for the fabric you are sewing. Be sure to use a needle size that is large enough for the thread being used to make sure that the thread passes freely through the needle’s eye.
Needles can break if they have not been correctly inserted into the machine, which can occur if the needle clamp screw was not unscrewed enough when inserting a new needle allowing the needle to be seated all the way up as far as it will go in the needle clamp. Your machine Owner’s Manual has a diagram (on page 22) that illustrates how to correctly insert the needle.
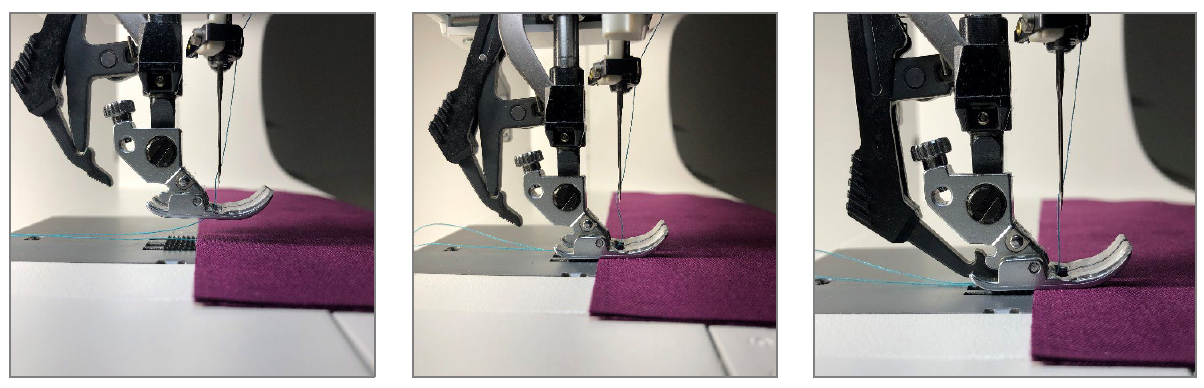
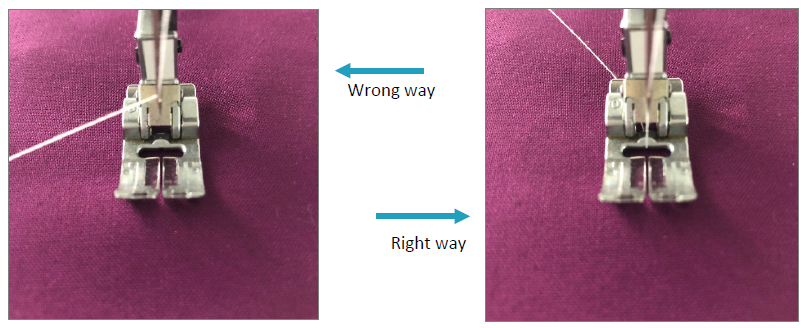
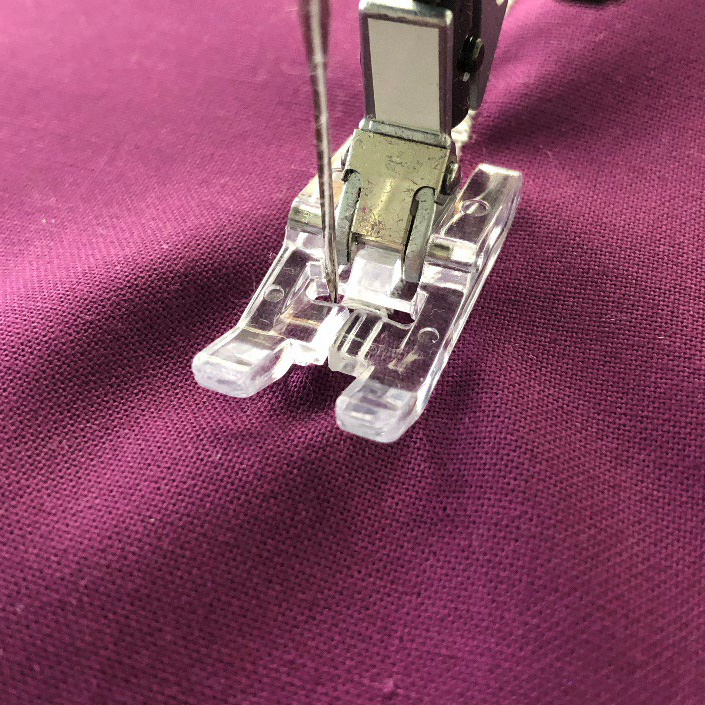
Needles can also break if you are “pushing” or “pulling” the fabric while sewing (see images below), as this can cause the needle to deflect and then break. The feed dogs are there to draw the fabric under the foot as you sew – you just need to guide the fabric!

Upper Thread Is Breaking
If the upper thread is breaking, it is possible that the thread path is being obstructed, the machine is not correctly threaded, or the upper thread tension is set to tightly. Be sure that the thread spool is placed correctly on the spool pin (pushed up next to the spool) and there are no obstructions (for example, thread getting caught behind the spool cap, behind the spool, or a “rough spot” on the spool itself).
Use the correct spool pin for the size of thread spool you are using. For example, larger thread spools require the larger spool cap. Smaller, narrower spools require the smaller spool cap. Check also that the thread is unreeling smoothly from the thread spool and not getting tangled on itself.
Adjust the upper thread tension to make sure it isn’t set too tightly.
Stitches Are Skipping
If your stitches are skipping on the fabric as you sew, this could be an indication that the needle was inserted incorrectly. Make sure that the needle goes all the way up into the needle clamp and that the flat side (at the top section of the needle) is facing toward the back. More information on how to correctly insert a needle can be found on page 22 of your Owner’s Manual.
Skipping stitches may also occur when the needle is the wrong style for the fabric.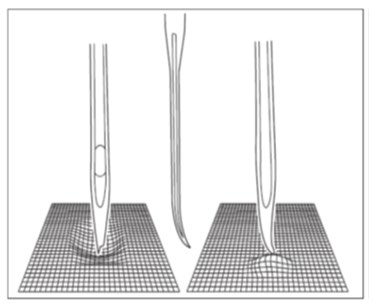 For example, if you are sewing a stretch knit fabric using a regular point needle, you could be experiencing skipped stitches and switching to a ball point needle can help prevent stitches from skipping on stretch knit fabrics. For more information about needle sizes and styles, check out the PFAFF® Accessory User Guide on the PFAFF® website.
Worn out or damaged needles can also cause skipped stitches on a variety of fabric types. Discard the old needle and insert a new one, appropriate for the fabric you will be sewing.
Stitches Appear Distorted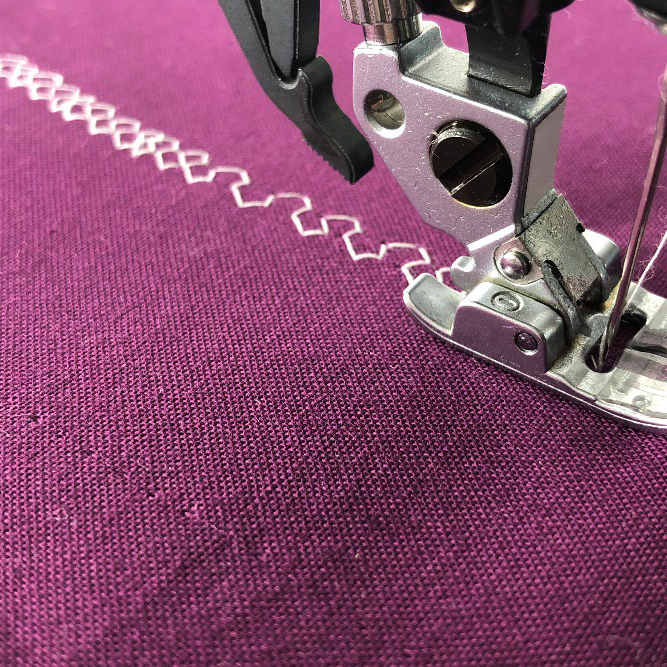
Stitches can appear distorted if you are “pushing” or “pulling” the fabric as you sew, as shown in the photo.
Another reason stitches could appear distorted is if the incorrect presser foot is used. For example, dense stitches usually require the use of a foot that has a “groove” on the underside that allows dense stitches to pass freely underneath, such as a Clearview Foot or Fancy Stitch Foot. If the Standard “0” Foot is used for dense stitching, stitches could begin piling up under the foot. Just switch to a presser foot that is more appropriate for denser stitches.
Thread Is Bunching at the Beginning of Sewing
Threads can get bunched up at the beginning of sewing if the top and bobbin threads have not been properly placed underneath the presser foot before starting to sew. Ensure that both threads are under the presser foot and placed toward the back of the machine before lowering the presser foot to start sewing.
Threads can also start bunching at the beginning of sewing if the stitch length setting is too short for the stitch you have selected. Increase the stitch length setting. You may want to test on a scrap fabric first.
Another reason threads can bunch up is if the wrong presser foot is being used for the selected stitch. For example, satin stitches are very dense, and stitches need to have room under the presser foot to pass freely underneath. If you are sewing a dense stitch pattern, use your Clearview Foot or Fancy Stitch Foot for best results.
Bobbin Doesn't Seem to Fit the Machine 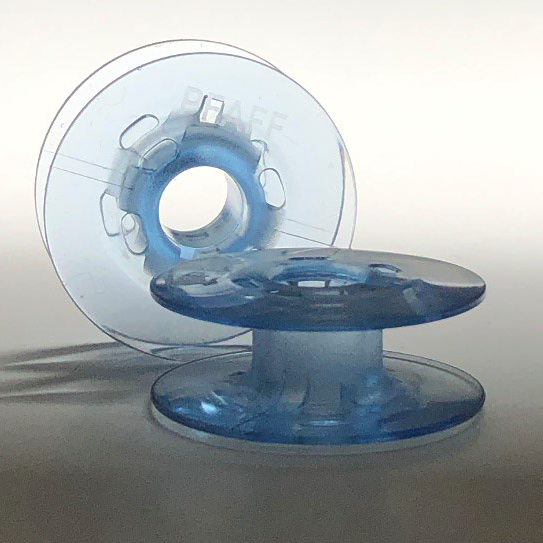
It is important that the bobbin used in the machine is the correct size and style, or the machine will not function properly. Your machine came with several bobbins, but if you want to purchase additional bobbins, make sure to get the correct ones! Check the PFAFF® website for more information on bobbins, as well as other available accessories.
The PFAFF® machine code for accessories available for your machine is “D”.
Part number for the bobbins is: 820779096
Fabric Is Tunneling or Puckering under the Stitches
If fabric appears to be pulling together under the stitches, this is often a sign that you should use a stabilizer or interfacing underneath the fabric. The stabilizer will support the fabric and stitches when you sew particularly dense stitches, such as when sewing decorative stitches or doing machine applique. Generally, use a tear-away stabilizer for woven fabrics and a cut-away stabilizer for stretch fabrics. More information about stabilizers is available on the PFAFF® website.

PFAFF, SELECT and PFAFF PERFECTION STARTS HERE are exclusive trademarks of Singer Sourcing Limited LLC or its Affiliates. © 2024 Singer Sourcing Limited LLC or its Affiliates. All rights reserved.